Electric Guitar | Rickenbacker
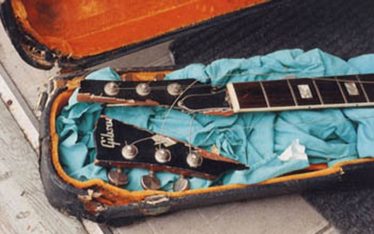
Tuning problem caused by a cracked neck
This repair involved the creation of a completely new five-piece headstock.
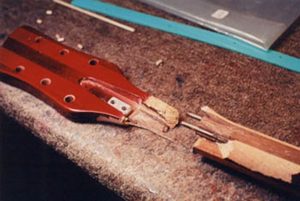
This broken five-piece guitar neck had been repaired previously with fiberglass, which was a very popular technique in the 1970s, and it was painted very dark to cover it. I don’t know why, but the crack itself was not glued. The owner used this guitar for more than 20 years after it was repaired, and for the last 10 years, he always had a problem tuning it. The neck was moving and had cracked open. The fiberglass didn’t stick to the wood very well, and it couldn’t hold the tension of the strings. The fiberglass around the crack was coming loose and could be chipped off very easily with a fingernail.
The crack, however, was not as simple as it appears. When you take a close look, you can see cracks crossing the grain at the nut on the face of the headstock (photo below). The cavity for the double-truss rod is quite large, so this is part of the reason that the neck is very weak. It is not really a good design functionally. We decided to make a new head since a glue job would not provide reliable strength.

Preparing for the repair
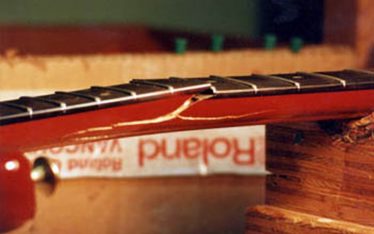
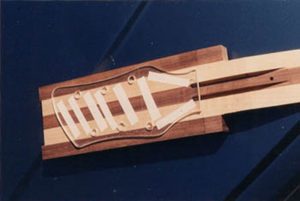
This repair, of course, started from measuring every part and making the necessary templates. Before I removed the headstock, I checked the head angle and thickness of the headstock and made a template (the long blue Plexiglass template in the photo below).
Making a new headstock
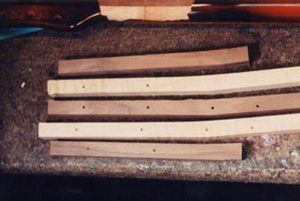
This head was made with three walnut strips and two maple strips. I made the head blank by gluing five strips using the blue template as my guide.
The five strips had to be made exactly the same width as the original strip. The template has a hole for a dowel and it was placed on the strip using a dowel, and each strip had to be shaped with a router. The head blank was made when the five strips were glued together with a dowel.
It was very hard to shape the joint because of the double-truss rod. After the outline was cut with a router using a special jig that I made, I adjusted and finished it using a chisel.
I forgot take a picture of that part of the process; I will get one next time I do a similar repair.
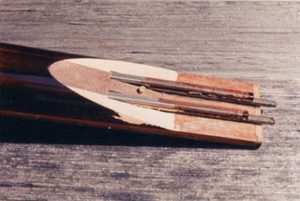
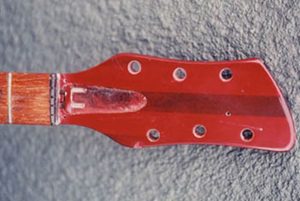
After shaping the joint on the new section by about 95%, the double-truss rod channel had to be routed out. This task is so critical, because if this channel is off, then the walnut line won’t be aligned with the original walnut line on the neck. After aligning the two parts perfectly by sanding them bit-by-bit, I installed a dowel to secure them and placed the head template using double-sided tape.
You can see the truss rod channel and the shape of the joint quite well in this photo below. Now the head had to be shaped using a router, and machine head holes needed to be drilled at this stage.
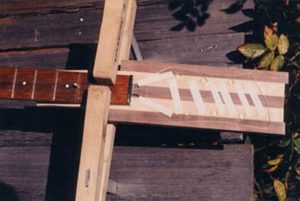
The neck part of the new section was still blank at this point.
After the head was shaped, the truss rod nut cavity had to be routed out. As the repair work gets closer to the end, then more precise work is required. If you make a mistake at this stage, all the effort you put in so far will be wasted.

Matching colors and finishing
After the head was glued, the neck had to be shaped. As you can see, the walnut strip line and the maple glue line are almost perfect, but the color of the maple is slightly different.
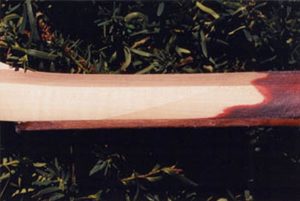
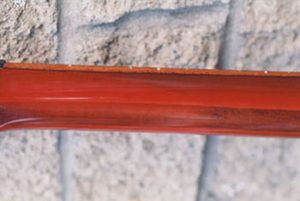
Now, you can’t distinguish the border of the new color and old color when compared with the photo below. The difficulty of matching colors is so hard to understand for someone who has never tried. I was very happy with this result.
Before coloring and finishing.

After coloring and finishing.