Electric Guitar | Gibson Les Paul Special, 1960s
Any repair must be done properly the first time, otherwise, it could cost you more in the end than you expect. Besides, a repair will be much more difficult if it is first fixed poorly, like in this case.
Repair specifications:
– Make a new heel and install the neck so the repair is not visible
– Restore the pick-up cavity
– Cosmetic finishing with a local spray job

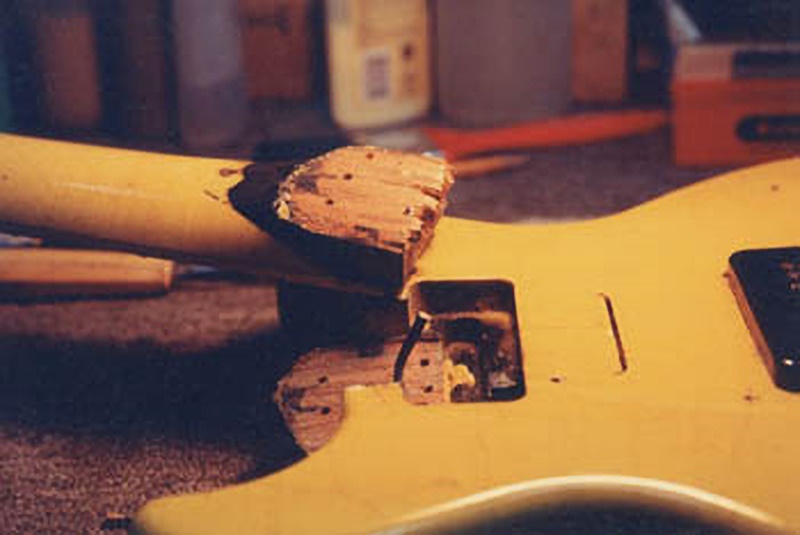
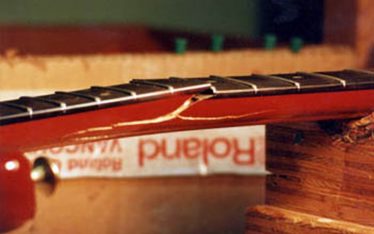
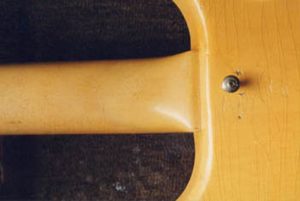
When the two parts, A and B, are fastened by screw, the screw hole on A (the part that the screw head sits on) should be larger than the screw hole on B. If both holes are the same size, then B will be pushed away from A when the screw goes in. In this case, in the previous repair, a few pilot holes were drilled, and after some glue was pushed into the crack, nine screws were installed. But because of the same reason described above, the small crack grew larger, so the damage became worse instead of being mended.
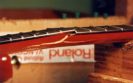
This new damage was covered with black paint, but because of the string tension the neck separated completely from the body.
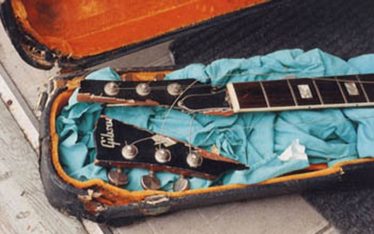
The guitar was so painful to look at, with nine screws in it and a messy black paint job.
The owner wanted to restore it properly, because this guitar had sentimental value to him.
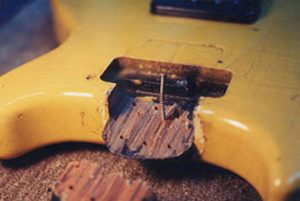
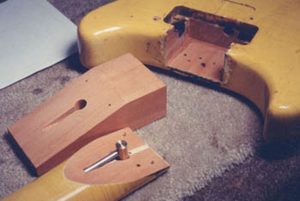
All the screws had to be removed and the neck pocket had to be cleaned.
The original neck was mounted as far as possible in between the two pick-ups. I didn’t remove that part of the neck, because it was not damaged and it wasn’t necessary to touch it. I always try to do the minimum repair needed and keep as many of the original parts as possible. Then I can usually make it close to an invisible repair.
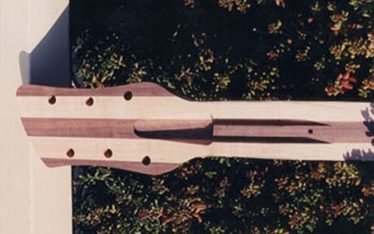
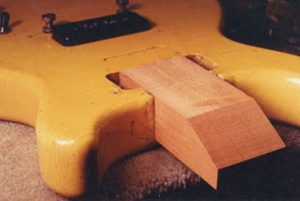
The mahogany block for the new heel had to be perfectly fitted to the neck pocket and aligned to the original extended part of the neck on the body in between the two pick-ups.
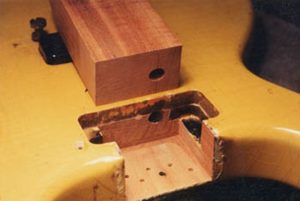
The original wiring hole was drilled with a long 3/8-inch drill bit from the jack cavity located on the side of the guitar near the lower bout.
So the new hole for the pick-up wire on the new block had to be drilled at exactly the same angle as the original.
The truss rod had to be removed to make a new gluing surface. I made a new truss rod and anchor, and then made a channel for the rod and hole for the anchor on the new block. The angle of the gluing surface on the new block determines the neck angle, so extra attention is required for this task. Two dowels were used under the last fret on the treble and bass sides to stop any slipping.
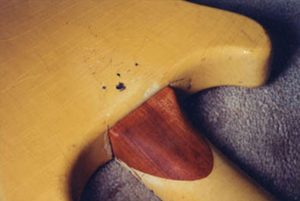 After the two parts were glued, the heel had to be shaped like the original.
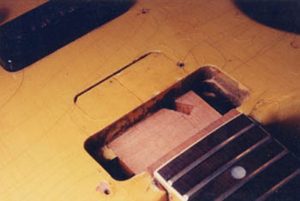 When routing out the pick-up cavity, you see the reason why the wiring hole had to be drilled at the same angle as the original wiring hole.
 Once the cavity for the pole pieces of the pick-up was routed out, next was preparing for the finish.
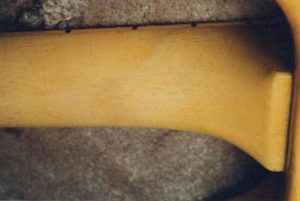 If a new, local finish is nicely blended into the original finish, it can be an invisible repair even with an inspection of the inside of the pick-up cavity.
 Originally, this guitar was finished with a solid yellow, but the color of the wood filler came through the finish. Still, it makes for an interesting effect. It is very difficult to deal with aged finish, but it is also very hard to make a new finish like this. I think the result was acceptable after some trial and error.