Acoustic Guitar | Washburn, Nyron Strings
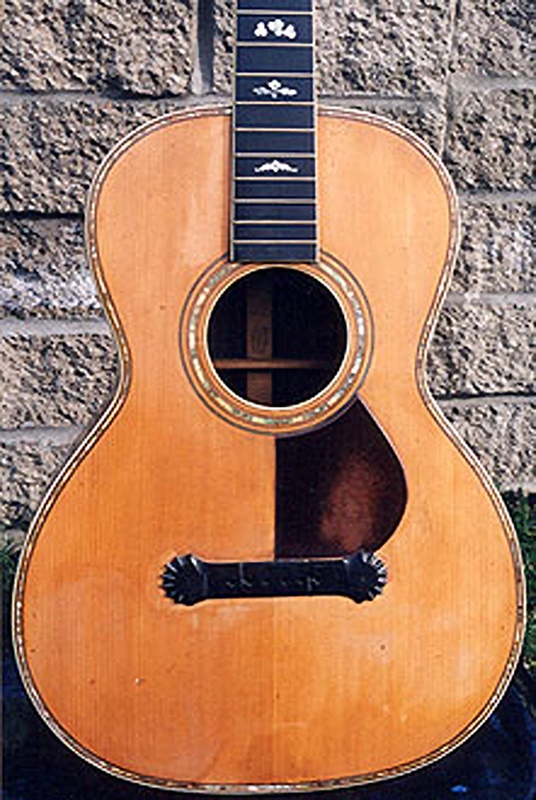
Before repair
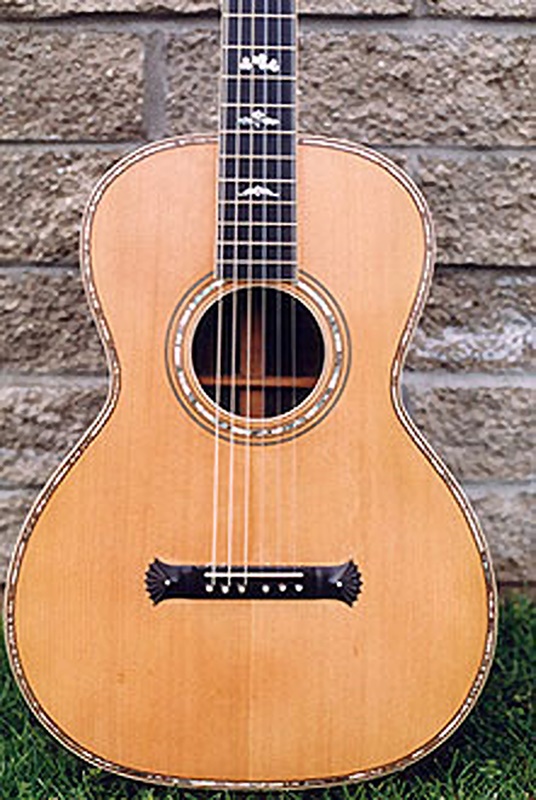
After repair
Restoration of the guitar bridge, pickguard, and soundboard.
Description of main repair work:
– Removing the pickguard
– Removing the bridge and making a new one
– Refinishing the top
This guitar was a mystery. It’s a Washburn, for sure, but the big mystery was the bridge and pickguard. Both were too ugly to be the originals, but they were a nice try by an amateur. Unfortunately, we couldn’t find a photo of the same model, so we had to re-construct parts by copying a model that was very close to this guitar’s specifications and era.
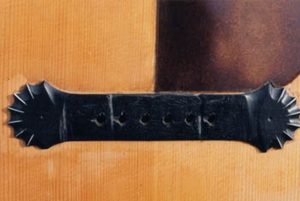 When we removed both the pick guard and bridge, it was proved they were not the originals. There was so much detail work everywhere on the bridge. Someone spent a lot of time and effort to make this complicated piece, but the workmanship was not as good as Washburn’s. Nonetheless, whoever attempted this deserves some credit.
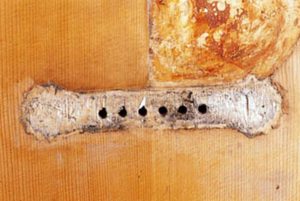 After removing the pickguard and bridge, we stripped the finish off the top. You can see that the color of the wood underneath the pickguard and bridge is different from the rest of the top. It is impossible to return discolored wood back to the original color without a lot of sanding. Although it’s not perfect, there is a way to fake a match using a coloring technique.
I chose the bridge on a Washburn guitar that we believed was the closest match. I measured every part of the bridge precisely and took a photo, because I couldn’t keep the guitar with me. This bridge was very different from any that I’d ever seen before.

The original photo I took

The new bridge
The picture left is the original photo I took, and the one right is the newly made bridge. Take a good look. The spacing between the six bridge pins is not even. There is a gap between the pins for the G and D strings. As you can see, each string starts at the side of the pin, not at the center like a regular guitar. You can also see the end of the string in front of the bridge under the string. Actually, there are six holes in front of the bridge. The strings go through their respective holes and come out on the outside of the bridge pin. Then they go around behind the pins and then to the machine heads. WHY?! Why was it made so complicated? I can’t think of any good reason. A carved wing is beautiful, but it’s very hard to make. This is clearly a bridge made to satisfy the craftsman’s ego.


When I glued the new bridge with new finish on the top, the bridge matched the whole guitar design and provided a very good “atmosphere”. The design of the head joint is also superb. It is simple but very effective. Even though it is very ornamented and required an uneconomically large amount of labor, this guitar is not aggressive and has a very elegant, feminine touch about it.
This is one of the guitars that I wish I could add to my collection.


